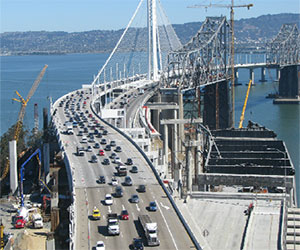
In order to meet the completion dates on your projects, it is wise to develop a project schedule. Whether you’re managing the construction of the new Oakland Bay bridge or building a new shed in your back yard, adequate planning can ensure any project is completed on time, on budget, and meets all of its intended goals.
In this article I will give you a 5 step crash course in schedule development. But since many schedules sit in a drawer (or software) and never get seen again, I will help you translate a good schedule into timely completion of project deliverables.
The five to developing a schedule are:
- Define Activities
- Sequence Activities
- Estimate Resources
- Estimate Durations
- Develop Schedule
Step 1: Define Activities
I believe one of the major reasons for cost overruns on projects of all types is the inadequate identification of tasks. And let me guess, you probably think you know them all for your project already. But have you thought about all the peripheral stuff, like permits, monitoring, or approvals – internal or external? What about unexpected external things like weather, public opposition, adjacent landowners or past owners (of anything)? What about bureaucratic things like contract signatures, procurement and tendering? Do you have any security needs during the project?
It is these peripheral things that trip up most projects, and I would encourage you to take a moment to simply make sure all the activities are defined. Don’t worry about the order, duration, or resources, just identify all the tasks.
The level of detail shouldn’t break down to more than 15 or so tasks per phase, or else it becomes too difficult to handle. If you need to break it down further, introduce a new phase (group of tasks) to keep it manageable.
Here is a real world example. At the engineering firm where I am part owner, a bridge replacement project had the following tasks:
- Site survey
- File review and data collection
- Site visits
- Hydrology
- Hydraulics
- Develop replacement options
- Create cost estimates
- Write report
- Professional review and revisions
For brevity, this was just the first phase of the project, which involved determining the length, size, and other parameters before proceeding to detailed design. And no, this wasn’t the new Oakland Bay bridge. I wish.
Step 2: Sequence Activities
The next step is the ordering of the tasks and identification of dependencies. There are four types of dependencies:
- Finish to Start (most common). Task B cannot start until task A finishes. For example, girders cannot be lifted onto the bridge until the piers are built.
- Finish to Finish. Task B cannot finish until task A finishes. For example, in-stream work cannot finish until pile driving has completed.
- Start to Start. Task B cannot start until task A starts. For example, as soon as the writing of the report begins the professional review can begin.
- Start to Finish. Task B cannot finish until task A starts. For example, the environmental permit approvals cannot start until the field testing finishes. This dependency is quite rare.
You can skip this step if you want to. In fact, I would suggest creating dependencies does not add alot of value until you are managing a project with greater than about 10 people, or 30 tasks. Plus or minus.
Step 3: Estimate Resources
There are three types of resources:
- Money: Completion of the task requires an expenditure.
- Time: Completion of the task requires manpower.
- Tools and Equipment: Completion of the task requires the buy, rent, or lease of tools and equipment.
For each task, ask yourself how much of each you need. Put it into categories, like this:
| Task | Expenses | Employee A | Employee B | Tools & Equipment |
|---|---|---|---|---|
| Site Visits | $120 mileage | 25 hrs | 40 hrs | Measurement gauge – $250/day x 5 days |
Don’t worry about the units. Hours, dollars, or any other unit is fine.
Step 4: Estimate Durations
Proceed through each task and estimate its duration. Generally, a number of days will suffice for most projects, but there are instances where other units will work well. Keep the following things in mind:
- If you consistently over- or underestimate every task, this will compound into a large variance at the end.
- It is probably helpful to overestimate the duration to account for unexpected events.
- Your superiors (project sponsors, executives, etc.) will want to use the smallest realistic schedule, and you might be encouraged to shorten it later on.
Step 5: Develop Schedule
This can be done using a software product like ProjectEngineer, or one of the other project management products out there.
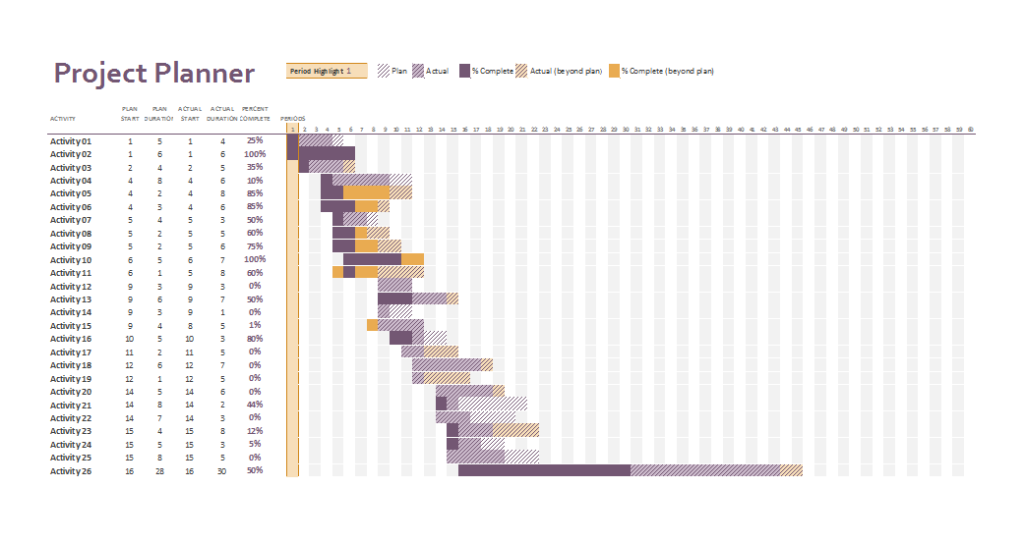
A spreadsheet works just as well though, in fact I used a spreadsheet for many years. You simply plot the tasks on the left, vertical axis and the durations in graphical form like a bar chart. Microsoft Excel’s template section has multiple variations that look great for putting into presentations. Here is an example that popped up on the first page of my excel templates screen.
This is called a Gantt chart in project manager terminology.
Keeping your Schedule On Track
Sometimes it will feel pointless to put something on paper that’s almost guaranteed to change. Because this is an article about creating schedules, I would be remiss if I didn’t point out the key parts of making sure the schedule results in a successful milestone, or more generally, a successful project.
- The schedule must be meaningful. There’s nothing that makes workers ignore schedules quicker than seeing an unrealistic task duration created by an uninformed (presumed) person.
- Modify it only by the authorization of the project sponsor. The project manager must get project sponsor buy-in at the outset of the project and adjust it only upon approval of the sponsor (i.e. “above” the project). To put it another way, if you are allowed to adjust the project schedule every time you look at it, it’s meaningless.
- Hold regular progress meetings. I know, I know. Meetings are inefficient and expensive. But in most projects the schedule is by far the most important factor in the profit/loss equation, and a weekly (or as appropriate) progress meeting featuring the key project members is one of the few types of meetings that will probably pay for itself. However, progress meetings can easily degenerate into weekend catch-ups. It’s important to make sure everyone sees the schedule and discusses their part. Most of all, hold people accountable. Create a culture where it is not acceptable to sit in a progress meeting and say your part isn’t done, for any reason. There are always good reasons why something wasn’t done on time, so make it clear there are no excuses.
Let me know in the comments if you have anything to add.


